I’ve built dedicated commuters before like Orange Crush and Death Trap 2000, but I wanted to build a fat tire bike cruiser that would easily hit 35mph and still be able to climb any hill with ease. While surfing the internet for the coolest fat bike I could find I stumbled on the Soul Stomper with a Sturmey Archer 3 Speed IGH Polished fat bike located here for $899 shipped. I’ve been meaning to test the Sturmey Archer IGH for a while now and it was worth $899 to not have to do another PITA hub build so I sprung for it and just bought the bike before my wife could talk me out of it.

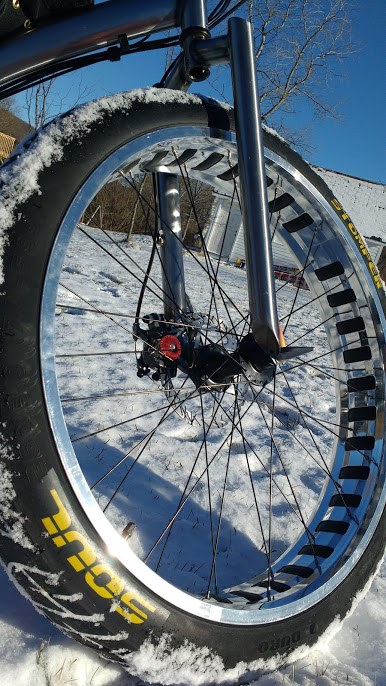
The scorching effects from welding are preserved under a clearcoat on the frame. Polished rims are the bomb.
The 3000W Cyclone mid drive kit I installed (available here for $389) took me about 8 hours to install with at least 3 of those hours wasted on trying to get the bottom bracket off this bike. I did a separate build thread located here for the cyclone which is mandatory homework for anyone thinking of buying and installing this kit. I wanted a reliable long distance commuter which would easily hit 35mph all day long and still be able to climb almost any 10-degree hill with ease. In the end, I believe that I succeeded as this steel frame donor bike feels incredibly solid on the highway even at over 35mph.
I took a metal blade on my circular saw without a guard plate and cut off the crankarms as close as I could to the BB. Be careful to not hit the bike frame with the cutting wheel and use eye protection. I couldn’t get the bolts that held the crankarms off no matter what I did so this was my last resort. I couldn’t believe how heavy this crankset was, I’ve never seen anything like it before.
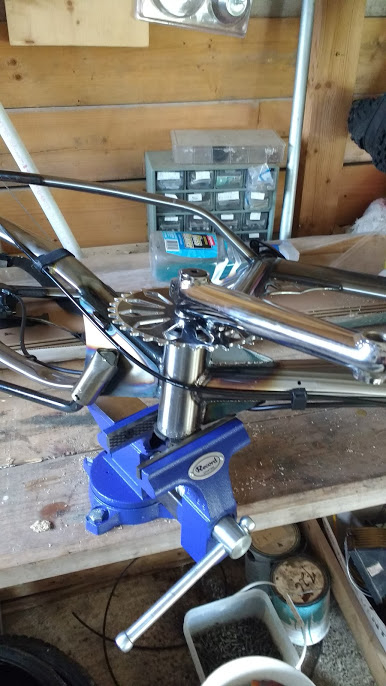
There is a special tool to remove this outer locking ring but again it was on so tight that I simply could not turn it. This trick of putting your bike on a vise and spinning it around works pretty darn well. At this point you’re probably about 30 minutes into it and wishing you had taken the frame to a bike shop to remove. They probably only would have charged you <$30 and it would have been oh so much easier. Too late now, you’ve got to keep going.
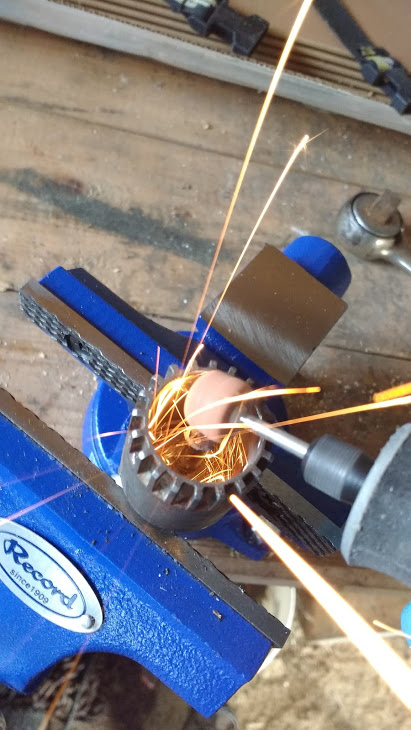
Step 3 : My bearing cup removal tool had a pin that would hit the axle so I had to grind it down so the tool would seat properly
At this point, you’re modifying your precious bike tools so that you can get this BB off you’re probably really wondering what the heck you’re doing and wondering if there is any way you can get back that money that you donated to my site a few weeks ago. Maybe if I ask really nice (too late I already blew it on crack cocaine Powerball tickets ).
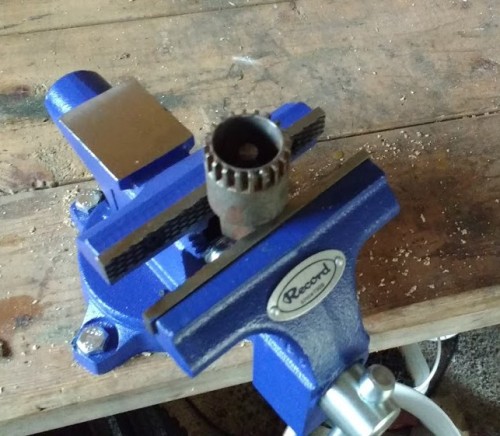
Step 4 : Put your ‘modified’ bearing removal tool in the bench vise and then use the frame as a ginormous lever. It will feel like something is going to break.
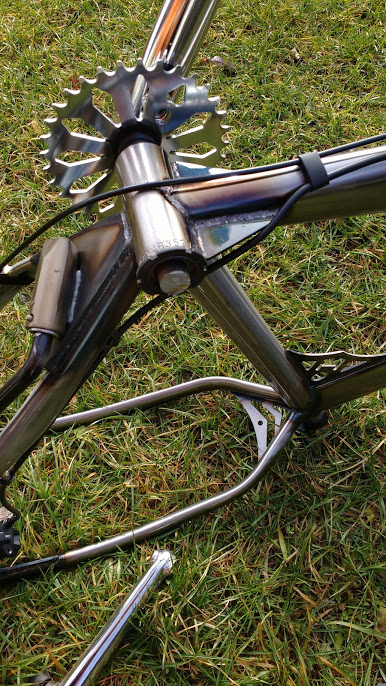
The end is near, I promise. When setting the bike on the tool to remove the bearing cup it must be fully and firmly seated on the removal tool (shown above). Remember that the drive side is reverse threaded (righty loosey) and turn the bike in the correct direction or the bb will get torqued on even tighter and will never come off. The non-drive side is threaded normally (lefty loosey).
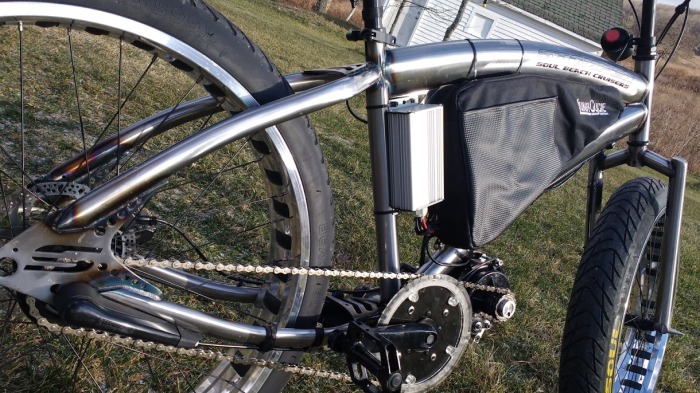
The scorched metal effect is pretty beautiful and the triangle bag helps to hide all the e-bike connectors
I feel like every commuter bike should have a headlight and tail light built into the bike to run off the battery pack. The best way to wire the lights on this kit is so that they turn on and off with the ignition key, that way you’ll never kill your battery by accidently leaving them on. There are few things that make your e-bike as visible to zombie texting automobile drivers as a decent headlight. The headlight I put on this bike is the 15W cyclops (reviewed here) for $49 from lunacycle.com . This headlight is at least as bright as any motorcycle headlight and gives you tons of visibility at night. The rear light I used was this $15 unit from lunacycle.com that can take anything from 11-72v and is entirely sealed in silicone with a weatherproof on\off switch.
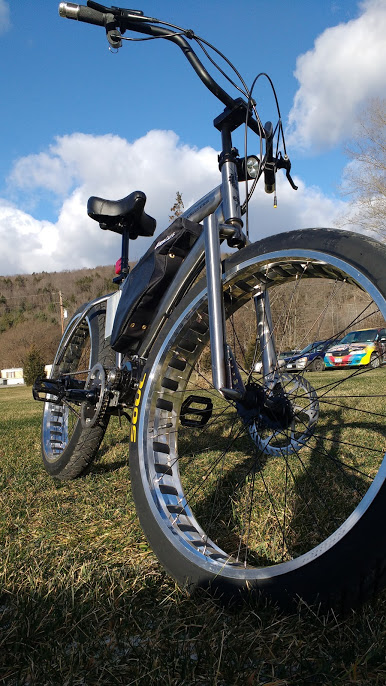
I like the headlight closer to the headset rather than up on the handlebars. Less dorky looking. Nice rainbow colored bumper.
The tires on this build are 3″ Duro’s mounted on 4″ rims. This spreads the tire out quite a bit more than it’s really meant to be ridden, but it still works very well on the road. I rode this bike with some heavy-duty tubes and at the max tire pressure that the tires would support (20psi). They felt a lot like motorcycle tires and were a little bit unbalanced at really high speeds (around 40mph). These tires are just normal fat bike tires and are really not meant to be ridden at 40mph. You have been warned.
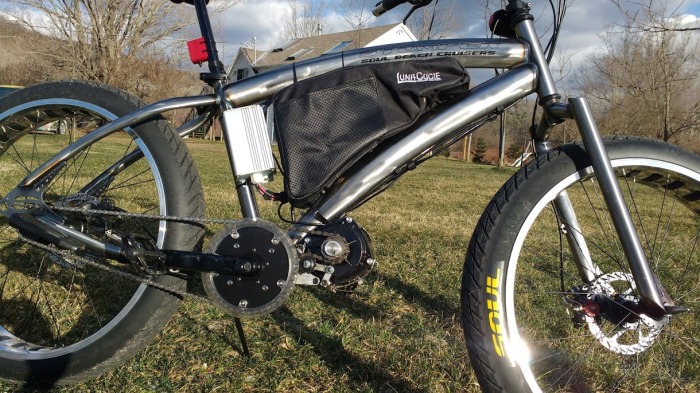
The controller was mounted on the downtube at a slight angle. I just zip tied it to the frame which worked well.
When it comes to placing the controller you can’t really put it in the triangle bag because it needs the outside air to cool off. It works best to mount your controller with the wires on the bottom so rain and water can’t as easily work its way inside your controller. There is a bunch of silicone where the wires enter the unit but I wouldn’t count on that keeping all the water out. The Soul Stomper ships with a rear hydraulic brake which works reasonably well and I threw an avid BB7 on the front because it’s much easier to attach an ebrake connector on a cable actuated brake and the BB7 is the best cable brake I’ve ever reviewed. You really want the front brake to not suck when you are going highway speeds.

The Sturmey Archer 3 speed IGH works awesome even at high power under load and shifting was silky smooth
I have absolutely no complaints about the Sturmey Archer 3 speed IGH other than the infernal clicking that it makes some times when it is spinning. I am told that this clicking goes away as the IGH ages, but mine is still doing it. I got an extra set of internal gears for this hub from Soul in case this hub fails, but even when upshifting it under 2000W of power, it barely seems to notice. This IGH has about 177% range which is a little less than the Nexus 3 which I also love, but it is available for 170mm dropouts while the popular Nexus 3 will only fit on 135mm dropouts. The Nexus 3 weighs in at about 2 lbs and the SA is about 3lbs (not including the cables and shifter). The Nexus 3 is much easier to adjust but the SA is pretty easy too (Soul video here). Both run about $100 for the hub plus a little more for the shifter and cogs. I found a Sturmey Archer SX-RK3 hub only for sale for $95 here online. The only change I made to this setup was to swap out the 18T cog with a 15T cog so I could pedal along comfortably with it at 35+mph. This high gearing (44T/15T) will take away some of the wheelie popping torque but being able to pedal it makes it much more like a bike and not such an electric scooter. I bought a 15T 3-speed IGH cog on ebay shipped for $6.40 from the Netherlands and most of the 3 speed IGHs (Shimano, SRAM, Sturmey Archer) use the exact same cogs with only 3 little nubs on the inside of the big hole.
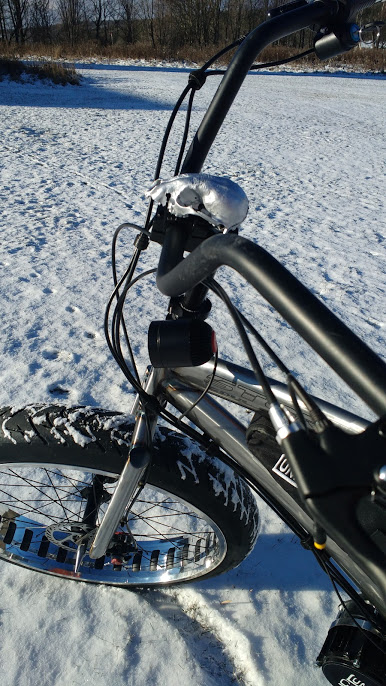
Nothing strikes fear into their hearts like a tiny chrome skull with little teeth. Urinate in fear before me.
So was this build worth it? It depends really on what you’re trying to accomplish. I wanted to build a steel framed commuter that would be a real head turner and still have the power and speed that I’ve come to expect out of my trail bikes. In the end, I feel like I succeeded, as Burning Chrome is a pleasure to ride with its upright seating position, over-the-top cushy comfort seat and crank forward design. The Cyclone produces plenty of power and barely gets warm even when running at a 2000W continuous. The SA 3 speed IGH works great on hills and from stops and gives me enough power to make it feel like I’m driving a car without the constant wheelie-popping feeling of my super-low geared trail bikes. The Cyclone was built with a 52v battery that could deliver 50 Amps cont, the stock Cyclone controller can take 40 Amps continuous which is only 2000W peak with 52v. If you want to go faster with the stock controller (I’m not sure you need to) then you’ll need to use a 72v battery.
It’s a bike that I could use to replace my car with on sunny days without regrets. It’s a bike that any self-respecting drug dealer would want to take me out and steal. It’s a bike that will make both cops and women take notice as I drive by. The Cyclone is much louder than the BBSxx kits from Bafang and this kit just screams e-bike, but if you don’t care and you want people to look your way, then this might just be the build for you.
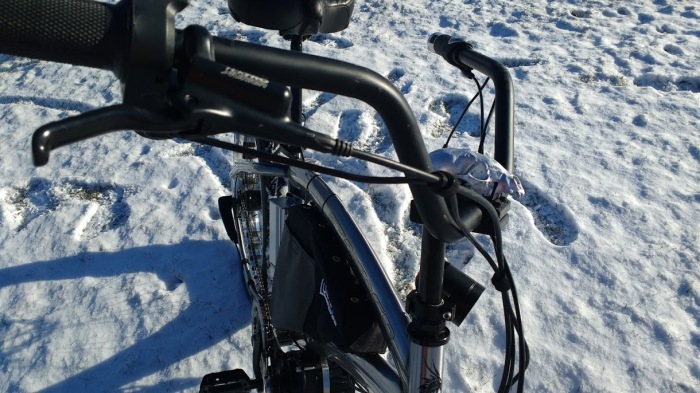
The skull was attached with zipties and some silicone. Drill holes in your the skull before you spray paint it.
Ride On.


Karl you are a bad person! How many of these contraptions are you going to make? 🙂
LikeLike
Pingback: Cyclone 3000W Mid Drive : If You’re Gonna Build Something This Illegal Then It Better Be Able To Outrun The Cops | Electric-FatBike.com
Pingback: Duro Beach Bum 3 Inch Tires Stretched Onto A 100mm Rim : You Can Tell All the Ladies That It’s 4 Inches, Really | Electric-FatBike.com
Pingback: The Dark Side – DIY Cyclone 3000W Nuvinci N171 Deadeye Monster ~$889 57lbs w/ out battery | Electric-FatBike.com
Karl, Did you use the standard square taper 83-110mm? I’m planning the same build, but I’m leaning toward the BBSHD. Any suggestions besides have the LBS remove the bb?
LikeLike
Yes I did.
My advice is go with the BBSHD. I have that mounted on the Soul Stomper and I like it a lot more. I could never get the PAS to work right on the Cyclone.
LikeLike
Hi Karl! I was looking at this bike for a build but I was concerned about the rear drop outs and installing a chain stay. From what I have read it seems like a rear chain stay is a good idea for mid drive bikes. I guess it might be possible to fabricate some. I was thinking of also using the bbshd and a 52v battery pack in a custom battery case.
LikeLike
I don’t know what you mean by rear chain stay. I think you mean rear shifter or rear chain tensioner. Since it is an IGH you don’t need a shifter and because the dropouts are horizontal you don’t need a chain tensioner. It should be fine with a BBSHD, that’s what mine is setup as now. I wanted PAS and couldn’t get the Cyclone PAS to work.
LikeLike
Rear chain tensioner like the ones used in BMX. Not am arm with idler to tension the chain. I thought this would help the rear wheel from moving under torque. How fast does it go with 1000w bbshd versus the cyclone? How does the bike itself ride? I was torn between the aluminum version of the soul stomper or the sikk system aluminum cruiser. I think the sikk looks better (minus the bars) but has a smaller opening in the frame for all of the goodies. Do I need an external controller for a non hot rod bbs? Thank for all of the help.
Joey
LikeLike
Hi Karl,
I agree with the other commenter. “you are a bad person.” I have an HP Velotechnik Scorpion 26FS (recumbent trike.) Matt Hughes EMPoweredcycles.com put a BBSHD on it with 52V/13.5AH pack. I just got it setup this way on 2/25/18. It really rocks. HOWEVER, despite perfect rear derailleur tuning, the damned chain keeps dropping on my XT mech with Sunrace 11T-40T 9 speed cassette. I use Lekkie 42T up front and chain line is bueno with trike layout. The chain klunks & farts in a very uncouth way on nearly ever shift. I feel like I have to excuse myself after all of the drama. After reading your articles on IGH, i decided to go with the durable Shimano Nexus-3, bought here for $130 (pre-built with shifter!)
http://www.americasbikecompany.com/Shimano-Nexus-3-p/x-wheel-shimano3set.htm.
I’m looking forward to cleaner shifts under load and better manners generally from this IGH. I’ll try to report back to you with my experience.
LikeLike
Pingback: Lunacycle Releases Their 50Amp BBSHD That I’ve Been Testing For 6 Months (But You Gotta Buy The Whole Bike) | ElectricBike-Blog.com
Pingback: Reminds Me Of A Ducati – 72v Cyclone Kit On A Luna Fatty Cargo Frame | ElectricBike-Blog.com
Pingback: No One Gives A Rat’s Ass About Your ‘Street Legal’ Ebike : Build Something Awesome | ElectricBike-Blog.com
Pingback: Too Much Is Never Enough : Reprogram Your 50 Amp Luna Ludacris BBSHD Controller To Run At 60 Amps | ElectricBike-Blog.com
Hey Karl, Sweet build! I’m thinking of building one with a BBSHD… do you remember what the width of the bottom bracket shell was?
LikeLike
100mm, you won’t be disappointed.
LikeLike
Pingback: Take A Wild Guess : Selecting The Best Front Chainring Size For A Mid-drive Ebike On The First Try | ElectricBike-Blog.com
Arro tracero triciclo #26 fuerte para cargar
LikeLike
I love your taste in bikes ! I have been singing the praises of the IGH for a long time as for their use in ebike builds. Im always shouted down saying they just aren’t strong enough. Thank you for this build ! Btw….looking at the close up of your rear tire from this build. Are those directional tires ? It looks like the arrow is pointing the wrong direction ? Thanks again for a great and informative article. 🙂
LikeLike
Pingback: Top 10 reasons to build / borrow / steal a fast electric bike | ELECTRICBIKE.COM
Pingback: Too Fat or not too Fat, that is the question | ELECTRICBIKE.COM